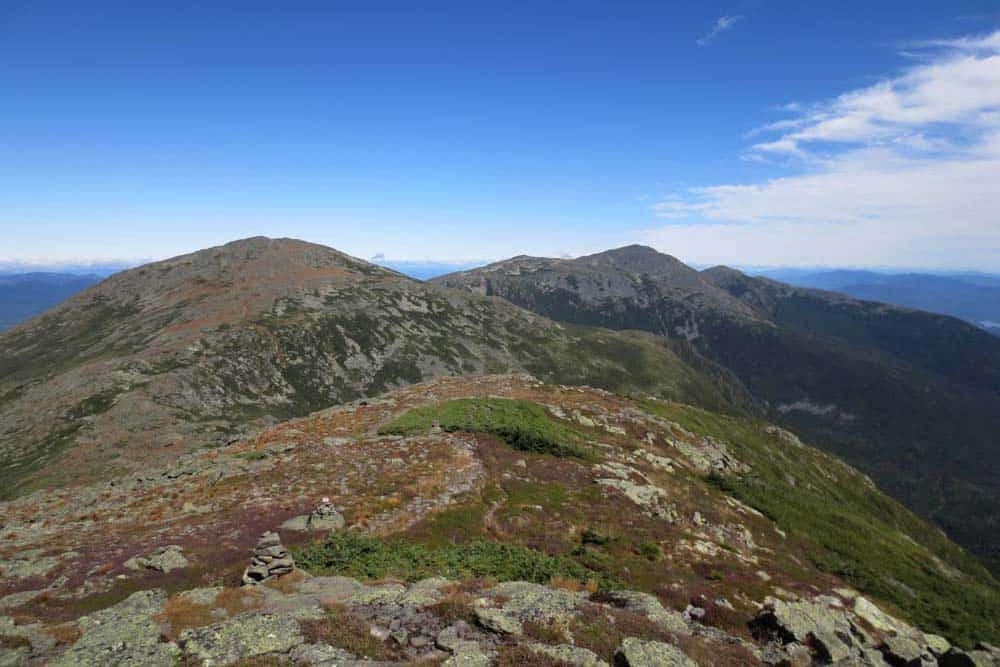
Hunters, hikers, mountain bike riders and anyone else who ventures into the wilderness needs to appreciate that injuries are a very real possibility. One of the reasons backcountry trips are exciting is because you’re disconnected from most aspects of civilization. And while being far from the urban sprawl can mean incredible stargazing it also means that if someone in your party gets hurt you, or one of your fellow adventurers will need to be the first responder of record.
Below, we’re going to take a look at some typical wilderness injury scenarios and the best ways to respond. This is not intended to substitute for real medical training. Instead, the goal is to provide you with some basic knowledge so you can respond in a productive way should an injury occur.
How wilderness first aid is different
You may already have some basic first aid knowledge obtained from the Red Cross or a couple of adult education classes, and that’s great. But it’s important to note that responding to someone having a heart attack on the sidewalk in the middle of the city is different to responding to someone who gets hit by a falling rock and breaks their collar bone in the middle of nowhere. Here are 3 fundamental ways the scenarios differ:
The amount of time involved – If you encounter an injured person in the city you should call 9-1-1 before you attempt to intervene. That way you know that, no matter what the scenario, the professionals are going to be there in a few minutes to take over from you. Not so in the backcountry. You may not be able to get a signal to call for help and have to care for the injured person yourself for hours or even days. Even if you can get a signal you may be in a place where a helicopter response is not available and it may be several hours or more before the rescue team finds you (1).
Limited resources – In the city the EMTs arrive quickly in an ambulance stocked with state-of-the-art equipment. In the backcountry you are limited to what’s in your first aid kit and whatever else you can improvise. With this fact in mind you have to make sure that your first aid kit contains as many useful items as possible including antiseptic wipes, assorted bandages including adhesive bandages, blister treatment, ibuprofen, antibacterial ointment and more.
Environmental hazards – In the city the stricken person will be removed to a hospital in short order. In the backcountry bad weather may close in on you while you are trying to care for your seriously injured friend. Temperatures may drop dramatically complicating the situation
and bad weather may make moving the person nearly impossible.
That said, let’s look at a number of specific injury scenarios.
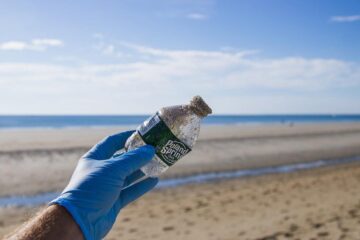
Wounds leading to blood loss
The backcountry is loaded with things that can lead to cuts or puncture wounds that produce significant blood loss. That includes broken branches, falling rocks, exposed tree roots and more. It’s vital that you know how to respond to a situation where extensive bleeding is involved.
The average body contains 5 – 6 quarts of blood (4.5 – 5.5 liters). If a person loses 2 quarts of that they’ll go into shock. Any more than that and death is a real possibility. So if a member of your party has sustained a serious injury and is bleeding profusely the situation has to be dealt with quickly and effectively.
In all but extreme cases blood loss can be effectively addressed by applying direct pressure to the wound and, if possible, elevating the wound above the heart so that the blood has to flow uphill, as it were, against gravity. If you have surgical gloves with you (and you should put some in your first aid kit), make sure you’re wearing them before you address such an injury.
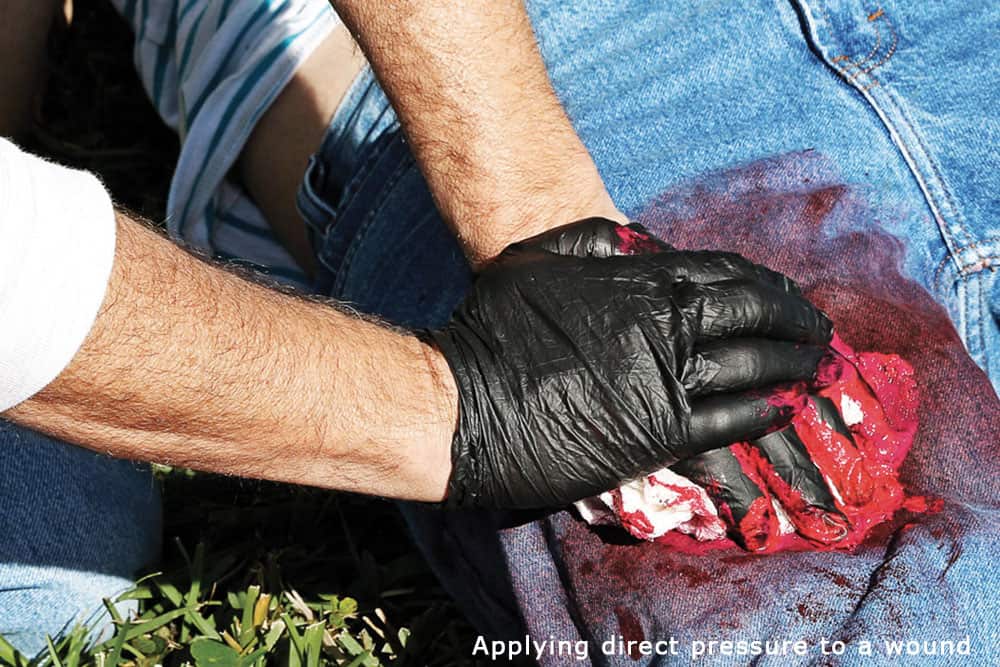
Hold clean gauze against the wound. When it’s saturated, add more gauze on top of it. Do not remove the saturated gauze. If you need your hands to be free but the person is bleeding heavily, wrap the gauze tightly with an ace bandage or something similar and make sure the injured person keeps the wound elevated.
Just remember this type of dressing is not a tourniquet. It shouldn’t be so tight that it completely cuts off circulation. Just tight enough to firmly hold the gauze in place while you do other things.
Injuries to the knees and ankles
Injuries to the ligaments and tendons of the leg joints are some of the most common backcountry injuries. While they don’t involve excessive blood loss or broken bones a seriously twisted ankle or knee can turn what was a pleasant hike into a slow, painful slog. Or, if conditions were already less than ideal, a leg injury can increase the element of risk several-fold.
Simply trying to tough it out with a knee or ankle sprain can lead to a chronic injury that permanently interferes with your ability to enjoy the outdoors. Without proper diagnostic equipment like an X-ray or MRI machine you won’t be able to make a pinpoint diagnosis regarding the nature and scope of the injury while on the trail. You should, however, be able to determine whether or not you, or the injured person can continue on the injured joint.
Determining whether an injury is “usable” or “unusable”
Soft tissue injuries of the joints are typically divided into two categories: “usable” and “unusable”. A usable injury is one where the mobility of the joint isn’t compromised and the person can put weight on it without any significant pain. An unusable injury is one where mobility of the joint is compromised and the person feels pain when putting weight on it.
Dealing with usable and unusable injuries
Dealing with a usable injury is typically a pretty straightforward affair that involves wrapping it with an ace bandage or athletic tape. You see this type of thing happening all the time on the sidelines of NFL games. Just remember that once the injured joint is properly wrapped you will need to be cautious going forward to avoid twisting or turning it again and making it worse. Also, if at all possible, add extra rest time to your schedule to accommodate the injury.
Dealing with unusable injuries
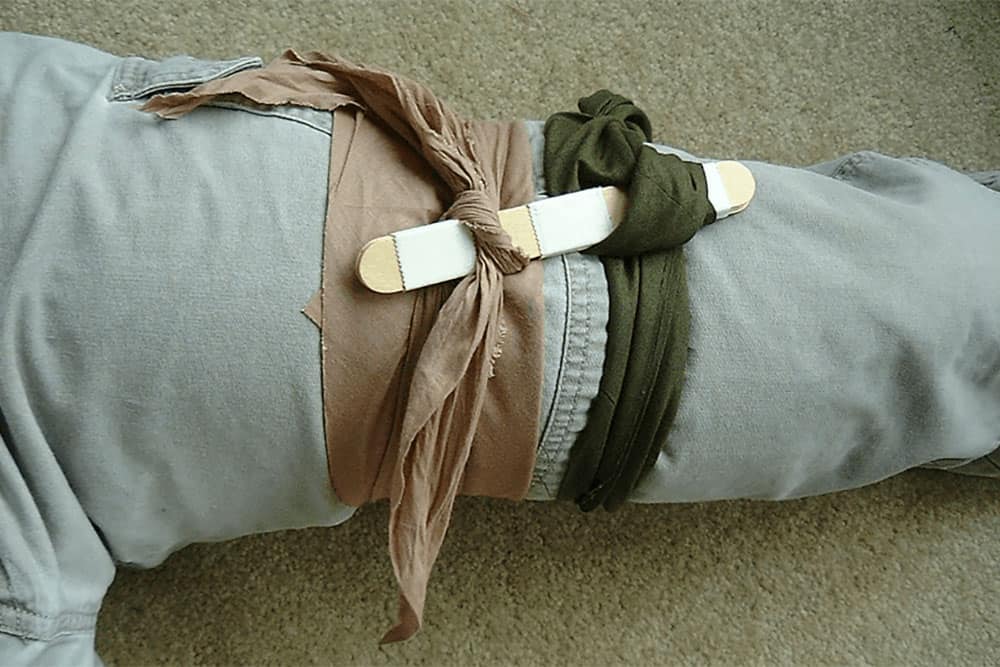
If joint mobility is compromised and the injured person experiences pain when putting weight on it then you will need to do more than wrap it in athletic tape. This typically means creating a splint of some sort. Most hikers and hunters don’t bring splints with them into the wild. Fortunately, it’s not a terribly difficult thing to improvise, as long as you have the aforementioned ace bandage or athletic tape.
For an unusable joint injury the key is to immobilize the joint. You do this through a combination of padding and compression. It’s important to make sure you immobilize the joint at the correct angle. For knee injuries that means bending the knee about 5 degrees from straight. For ankle injuries that means keeping the bottom of the foot at a 90 degree angle to the shin.
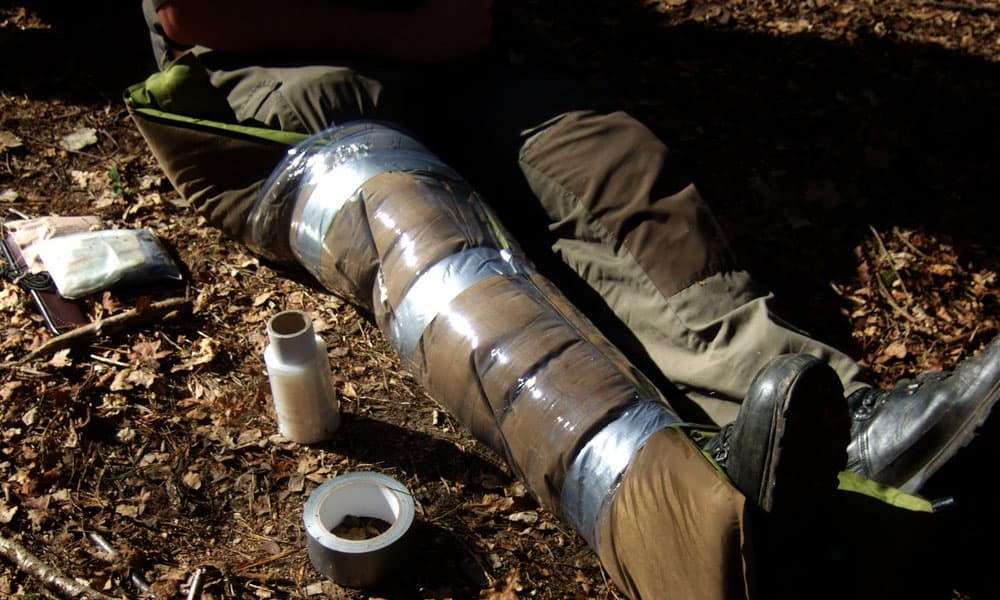
You can pad the injured joint with whatever is available, be it a t-shirt or some other article of clothing. Once the padding is set you will need to place something rigid on one, or preferably both, sides of the joint and wrap it tightly to hold it steady.
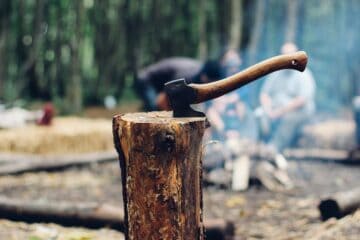
If you are in a wooded area branches are a readily available and perfectly acceptable material. If you are above treeline or in an open area you’ll need to be more creative. As for wrapping it, you can use a belt or webbing or anything that’s long enough and can be tied in an effective knot.
If the injury is so severe that the person is completely incapable of walking, no matter how slowly, then you’ll either have to call for help, or run for help if you cannot get a phone signal. However, if the terrain is not severe and the injured person is able to move, albeit slowly, with the splint you should try to hoof it out.
About tourniquets
In the event of a wound that is causing massive, uncontrolled blood loss that cannot be arrested using direct pressure a tourniquet may be your only hope. Keep in mind that tourniquets only work on arms and legs. They can’t be applied to torso, neck or head wounds.
Even on arms and legs the direct pressure method should be tried first. Only use a tourniquet if direct pressure fails to arrest the bleeding or if the wound is obviously too severe and gushing too much blood.
Applying the tourniquet
If all else fails and a tourniquet is called for you will need to make sure you apply it properly.
It’s always a good idea to pick up a commercial tourniquet and bring it with you just in case, since they typically only weigh 3 or 4 ounces. This is especially true for hunters who are susceptible to a more extensive array of injuries than the typical climber. These include knife and arrow penetrations and gunshot wounds. The video below will guide you through the proper application of a commercial tourniquet.
- If possible, lay the person down and elevate the affected arm or leg. This will help slow the flow of blood to the wound. After applying the tourniquet keep the arm or leg elevated.
- Don’t use anything less than an 1 inch wide for your tourniquet as it will cut into the skin. Ideally you want a tourniquet that is 1 – 3 inches wide.
- Place the tourniquet 2 – 4 inches above the wound. That is, between the wound and the heart.
- Tie a half-knot, lay a stick 4 – 5 inches long across the half-knot and then finish tying the knot over the stick.
- Turn the stick to finish tightening the tourniquet. Turn it gradually until the flow of blood stops.
- Once tightened, fix the stick in place by taping over it.
- If possible mark the tape with the time it was applied.
A word of caution
A tourniquet is not intended to be a long term solution to anything. It is the method of last resort only to be used in the event that direct pressure is inadequate to stem the flow of blood.
If there is a bit of good news it’s this: in the past many people assumed that applying a tourniquet doomed a given arm or leg to amputation. We now know this is not the case. Countless gruesome injuries to our military personnel over the past 2 decades in Iraq and Afghanistan have shown that a tourniquet can be left in place for up to 2 hours without necessarily causing any long term damage (2). That’s about 2 hours longer than previously thought.
So, depending on the extent of the wound, if you can get the affected person to the hospital within 2 hours they stand a good chance of making a full recovery, or at least retaining their limb. But 2 hours is about the limit. After that nerve damage and necrosis (3) begin to set in, and after about 6 hours all tissue below the tourniquet will likely be dead.
Dealing with shock
In a nutshell shock (4) is how the body responds to a sudden drop in blood flow. A lot of things can cause shock including blood loss, physical trauma, poisoning, heatstroke and more. If left untreated, shock is usually fatal.
It is not unusual for someone who has sustained a major injury while climbing or hunting to go into shock. Here are some of the most common signs to look for:
- The person becomes confused or anxious
- Their skin becomes cold and clammy
- Their pupils become dilated
- They develop a rapid heartbeat and shallow breathing
- They feel nauseous or begin vomiting
- They become weak, lightheaded or dizzy
- They experience all or most of the above simultaneously
If someone in your group is in shock you need to focus on treating the cause, rather than the symptoms. Here are several potential causes and how to deal with them:
Hypovolemic shock (5) – This type of shock is caused by excessive blood loss. So, the focus should be on stopping the loss of blood. To do that apply direct pressure to the wound or, if blood loss is too great, apply a tourniquet as described above.
Vasogenic shock (6) – This type of shock involves a widening of the arteries and may be caused by burns, insect bites, drug reactions or toxins. Dealing with this type of shock is difficult since it is often very difficult to know the exact cause. Timely evacuation to a medical facility is crucial.
Cardiogenic shock (7) – This is usually the result of cardiac arrest which means the proper response would be CPR. That means either performing continuous chest compressions to keep the blood flowing through the person’s body and brain, or a combination of 30 chest compressions followed by 2 breaths into their mouth while pinching their nose. Perform one of these over and over until they either start breathing on their own again or professional help arrives.
Regardless of the type of shock involved, you should aim to lay the person flat, keep them warm, elevate their legs and, once the cause has been dealt with, monitor their vital signs every 5-10 minutes. It’s also critical that you call for professional help immediately.
If you cannot get a phone signal and there are more than 2 members of your party, one will have to go for help while the other stays with the affected person. If there are only 2 of you, then once the person is stabilized you may have to leave them and seek help yourself. Remember, you may not have to go far before you’re able to get a signal on your phone, so keep checking the screen. If you get a signal, call for help then return to the affected person.
Burns
It’s not uncommon for hikers and hunters dealing with pots full of boiling water to wind up burning themselves either by the water contacting their skin, their skin contacting the stove or campfire flame, or by exposure to steam from the water.
In dealing with burns the first thing to do is to douse the burned area with cold water. It may take several minutes of this to arrest the burning process. After dousing the burn in water, clean the burn and the area around it, then apply an antibacterial ointment and cover the area loosely with a sterile gauze pad.
Preventing infection should be a priority so make sure to keep the area clean. Also, make sure the affected person drinks a lot of water. And give them ibuprofen to help reduce the pain associated with the burn. If the burn is extensive, exposes underlayers of skin or is on the person’s face, groin or feet you may need to consider evacuation.
Friction blisters

Friction blisters (8) are a commonplace in the outdoors but that doesn’t make them any less painful and disruptive. Being able to deal with them effectively can make the difference between having a successful trip and having a trip compromised by limited mobility, pain, and possibly infection.
Blisters form when the thick outermost layer of skin (usually on your feet) is repeatedly rubbed against another surface. This constant rubbing separates the outer skin from the softer, more delicate underlayers of skin. Blisters often occur when a person is wearing a new pair of hiking boots for the first time, or when their feet get wet inside their boots.
Once you become aware that a friction blister may be forming, just biting the bullet and pushing forward is not a great idea. Doing so will likely lead to the blister popping which could, in turn, lead to infection. A blister that bursts from rubbing can also be extremely painful and uncomfortable. Fortunately, treating friction blisters is pretty straightforward.
If the blister hasn’t already popped then pierce it on the side using a pin or knife point that has been sterilized over a flame. If need be, use some light pressure to help drain the blister. When it’s empty, wipe the area with an antiseptic wipe, then cover everything with antibiotic ointment and cover with a dry, sterile dressing.
Dehydration
Dehydration is a fairly common problem among hikers, rock and ice climbers, and hunters. It can be easily avoided by drinking enough water, and easily treated by drinking water during the onset of symptoms. In some cases, however, it can become life threatening if not treated in a timely fashion. Such is often the case in places like the desert southwest, including the Grand Canyon (9)(10).
- Confusion
- Disorientation
- Muscle weakness
- Muscle cramps
- Dark yellow pee
- Dizziness
- Irritability
- Cool, dry skin
- Fainting
Hunters, hikers, campers, trail runners and others are susceptible to dehydration. If dehydration is not treated and you continue pursuing your quarry, or pushing on up the mountain, you may well suffer heat stroke (11). Heat stroke occurs when your body is no longer able to generate enough sweat to keep it cool.
Many times dehydration sneaks up on unsuspecting climbers and hunters during the winter (12). This is often due to the fact that people consider it a hot weather phenomenon and are not on the lookout for symptoms when the temperature is at or below freezing. Even if they’re aware that they are becoming dehydrated the water they’re carrying may be frozen solid, which can complicate the response.
Just remember that staying hydrated is every bit as important in the cold weather as it is in hot weather (13) and that the signs of dehydration are there if you keep your eyes open to them. Also remember that when you sweat you lose electrolytes (14), including sodium. So it’s helpful to not only drink enough water but to bring something like salted peanuts along with you to snack on during breaks.