With so many digital miracles at our fingertips a lot of people have lost track of time-tested analog skills that could save their life if the power ever went out or the battery on their smartphone died. GPS, for example, is a great thing but it relies entirely on electricity, and access to electricity is not guaranteed.
Hikers, hunters and frankly just about anyone else who enjoys getting away from it all from time to time would do well to develop their compass and map reading skills. Because, no matter how much you paid for your smartphone it’s nothing more than an expensive paperweight when the battery dies.
Below we’re going to go over the fine points of how to use a compass, beginning with an introductory overview of the compass and its component parts.
Background
There is no ironclad evidence regarding who invented the compass, when it was invented or where. There is some evidence of the Chinese using magnetized lodestone (1) as a part of fortune telling rituals some 2,400 years ago. But the notion that this somehow equals the birth of the compass is like saying the taming of fire equals the invention of central heating.
Even earlier than that, in the 6th century BC a Greek philosopher named Thales of Miletus (2) is said to have discovered the magnetic properties of lodestone. And indeed the word “magnet” is derived from the ancient Greek city of Magnesia where lodestones were first found.
On the other side of the Atlantic there are those who theorize that the Olmecs (3) of Central America may have used a type of crude compass to align some of their temples 3,000 years ago. But again, like so much surrounding the ancient origins of the compass, this is pure speculation.
The only thing we know for sure is that the first navigational compasses appeared almost simultaneously in Europe, the Middle East and Asia around the 12th century. And there is compelling evidence to suggest that the Chinese and European compasses were invented independently of one another.
In the centuries since the compass has been continually refined, although at its heart remains the magnetized needle that always points to magnetic north (4), as opposed to true north, which we’ll get into shortly.
The Parts of a Compass
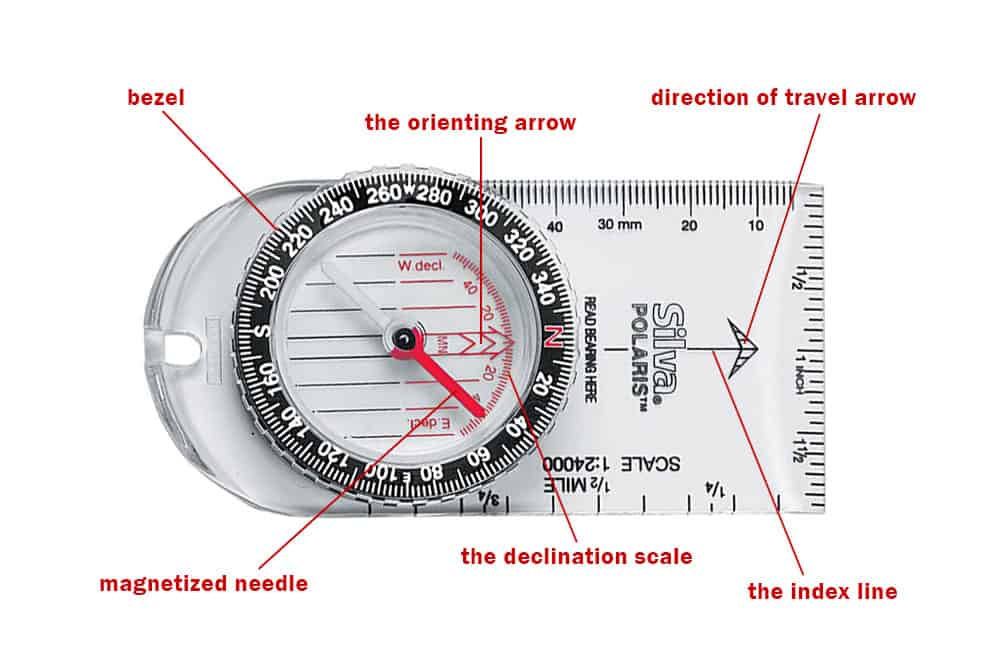
For the purposes of this tutorial we’re assuming you are using a standard baseplate compass. The vast majority of baseplate compasses have the following basic features:
The baseplate
The baseplate is a clear backing that allows you to see your map when you place the compass on it. All baseplate compasses have this clear plate which differentiates them from the pocket compass, which is typically encased in brass, bronze or stainless steel and resembles an old fashioned pocket watch.
The direction of travel arrow
You point the direction of travel arrow at the place or object you wish to travel to. Then line up the orienting arrow with north, as indicated by the magnetic needle. Then read the degree on the bezel that coincides with the direction of travel arrow and you will have your bearing, which you can refer back to to make sure you’re on the right path.
The index line
The index line is essentially the shaft of the direction of travel arrow that extends under the bezel so you can get an accurate reading of your bearing.
The rotating bezel
The bezel is the rotating ring that is marked in a clockwise direction with degrees from 0 to 360. Align “N” on the bezel with the north facing needle point and you’ll see your bearing in degrees above the index line.
The magnetized needle
The needle is the heart of the compass. No needle, no compass. The needle always points toward magnetic north. Always. It is this consistent reading that enables you to glean useful information from the compass, as all other components feed off of it.
The orienting arrow
The orienting arrow is not absolutely necessary, but it can be helpful in properly aligning the bezel with north so that you get an accurate reading of your bearing. The orienting arrow is also used to line up the compass with your map.
The declination scale
Not every compass has this, but it’s important if you want to or need to get a precise reading from the compass. We’ll get into declination (5) more in a moment but for now, suffice to say it indicates the difference at your position between magnetic north and true (geographic) north.
Important Things to Know
Before you head out into the backcountry or mountains with your compass there are a few things you need to know in order to ensure you get useful information from it.
Always hold the compass correctly when taking a reading
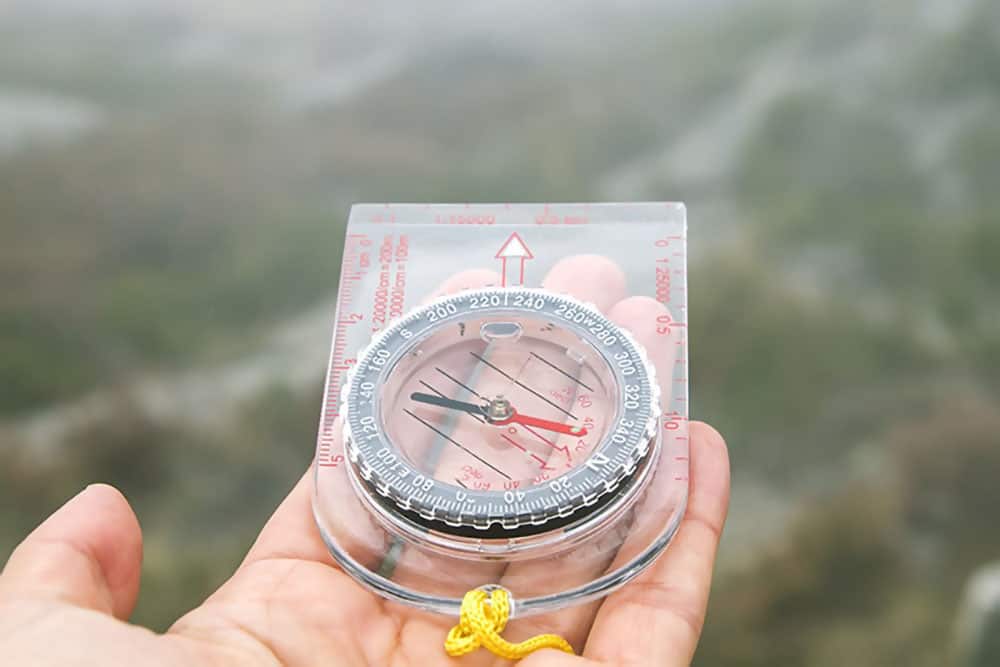
While the magnetic needle always points north that doesn’t mean you can glean useful information from your compass by holding it any old way. You need to hold it flat in front of you in order to ensure you get actionable readings.
Hold your hand out in front of you with your palm horizontal to the ground. Lay the baseplate compass flat on your palm with the direction of travel arrow pointing straight away from you. Now you are ready to take a reading and get your bearings.
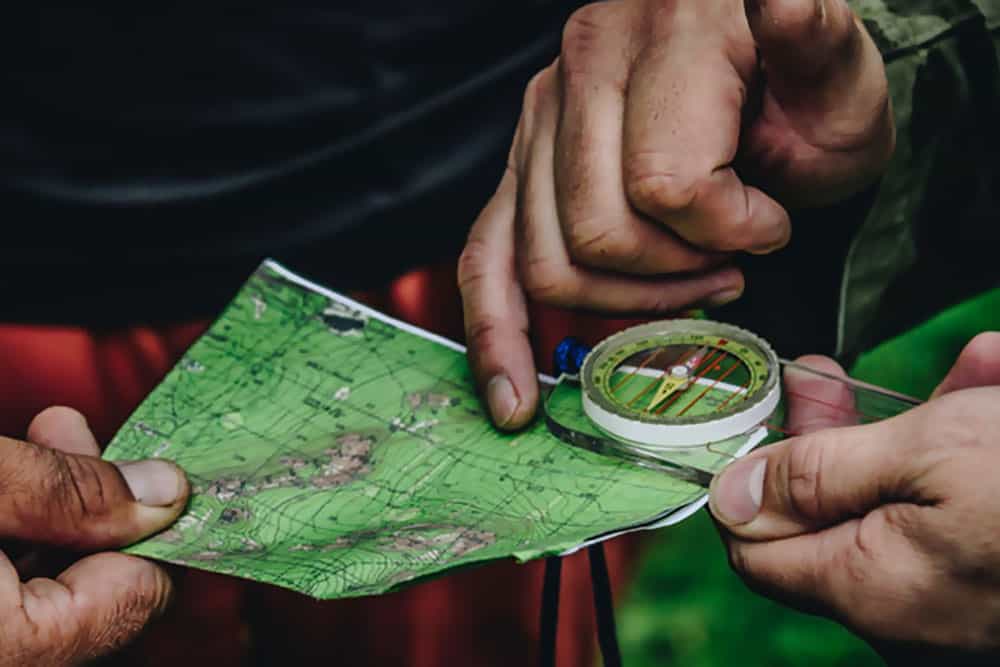
If you have a map, place the map on the flattest surface you can find and then lay the compass on top of it, again, with the direction of travel arrow pointing straight away from you.
Magnetic north and “true” north are two different things
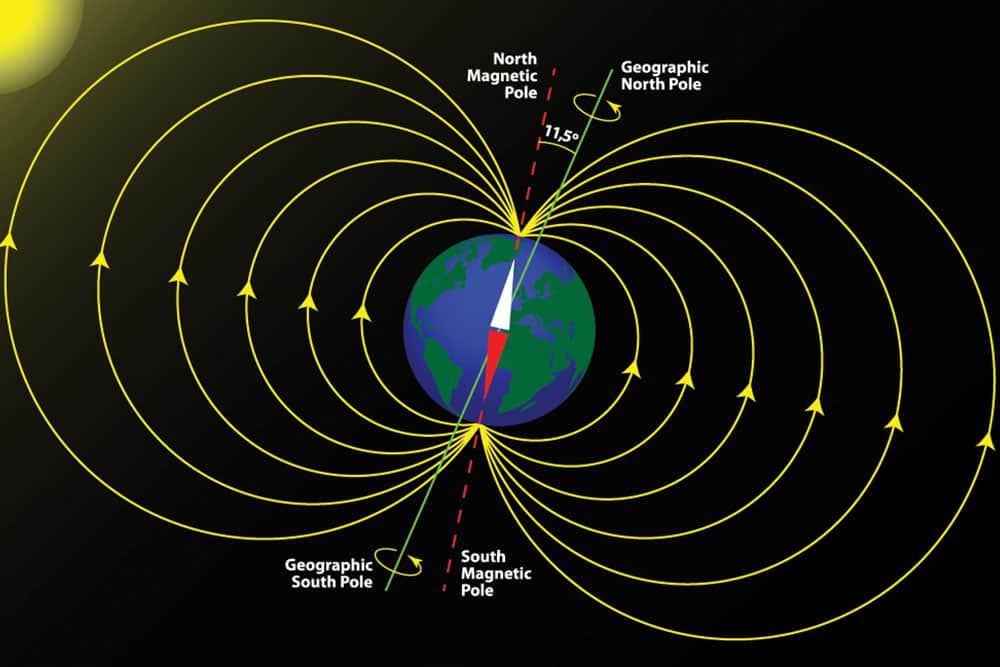
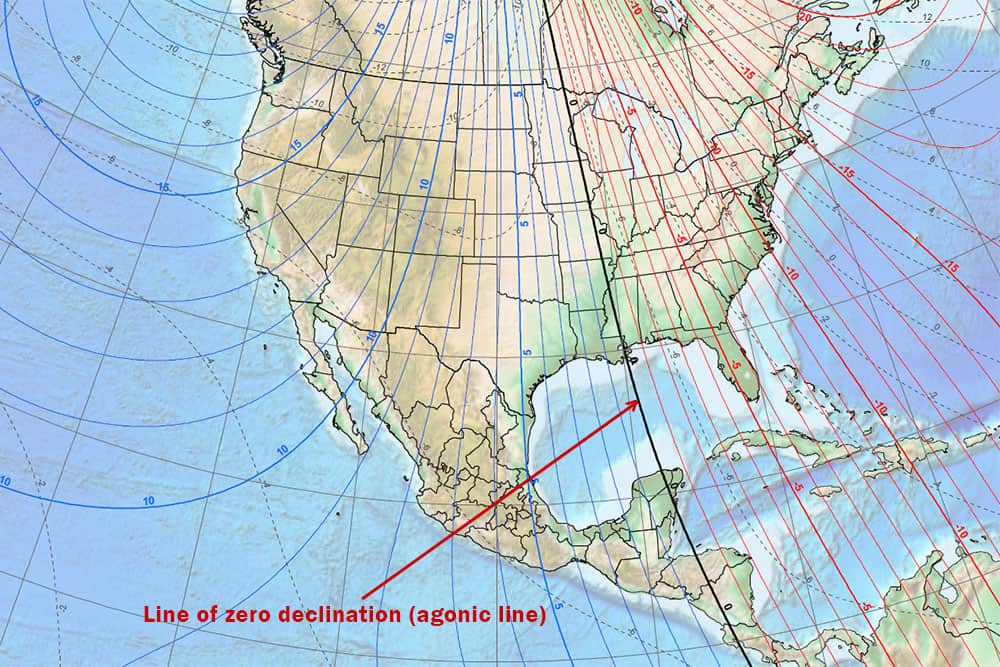
Because of the rotation of the earth the magnetic field just happens to emerge from the center of the planet near the south pole and then re-enter the earth near the north pole. With the operative word here being “near”. Because the magnetic field is not precisely lined up with geographic poles we have two north’s to account for: magnetic north and geographic, or “true” north. The difference between the two orientations is called “declination”.
Your compass is oriented toward magnetic north, therefore the readings you get from it are going to be a bit off when compared to your map. That’s because maps are always oriented toward true geographic north (6), what we call the North Pole. Why? Because the exact location of magnetic north changes constantly. In fact, since 1900 it has moved nearly 700 miles (7). So maps oriented to magnetic north would become obsolete shortly after being published.
And just to really confuse the hell out of you there is also “geomagnetic north” (8). The geomagnetic North Pole is determined using complex mathematical models that create an imaginary line ther the earth’s geomagnetic center. Like magnetic north, geomagnetic north has also shifted over the past century from northern Greenland to northern Canada. For the purposes of this tutorial however, we’re not going to concern ourselves with geomagnetic north.
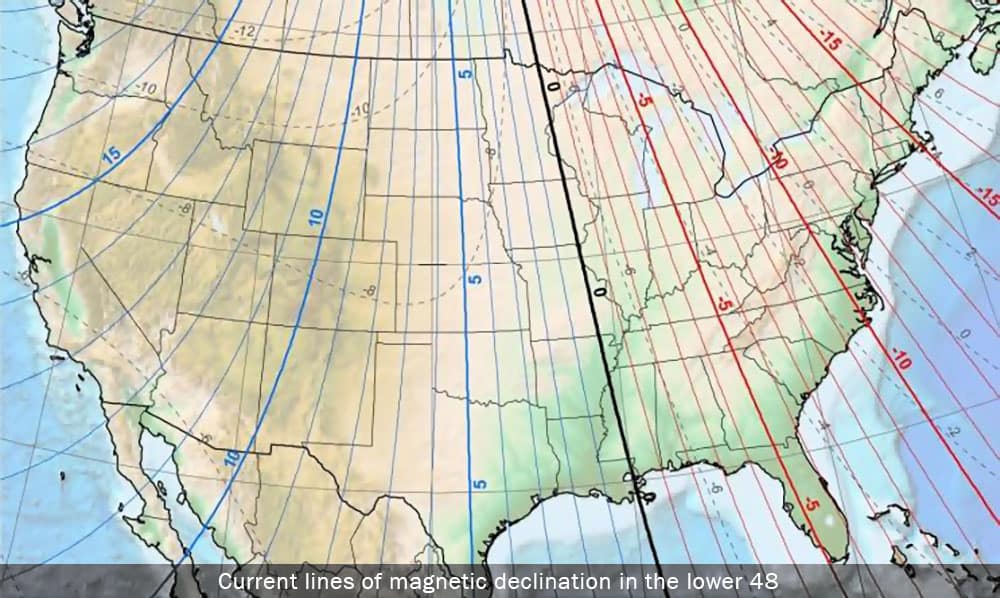
Currently, the line of zero declination (also called the “agonic line”) in the US runs north from New Orleans, up through Alabama, Arkansas, Missouri, Iowa, Illinois and Minnesota before moving into western Ontario. If you are in central Texas to the west or on the Gulf Coast of Florida to the east you’ll need to adjust for about 5 degrees of declination. And the amount increases the further west or east you go.
When declination does and doesn’t matter
Whether or not the discrepancy between magnetic north and true north is a big deal depends on how accurate you need your readings to be. If you’re on an established trail and you’re just using your compass to ensure you’re moving in the right general direction, then declination doesn’t matter all that much.
However, if you are lost in the backcountry and running low on supplies, or you are lost and bad weather has closed in around you, you’ll want to get the most accurate readings possible from your compass to give you the best chance of survival.
If you’re skeptical about that, consider that being just one degree off in your calculations can put you 100 feet off over the course of a mile. Over the course of 10 miles you’ll be off by 1,000 feet and that could be the difference between finding a trail you’re looking for, and having to spend the night outside exposed to the elements.
Using Your Compass in the Field
Now you have a pretty good idea of the various parts of a compass and what they’re for, as well as how to hold the compass correctly and what declination is. Now you’re ready to take your compass out into the field and put it to work. For argument’s sake let us say you are on an extended hike in the woods and you want to get your bearings to ensure you’re going in the right direction.
Stop and take out your compass. Hold it flat in front of you with the direction of travel arrow pointing in the direction you’re hiking. Unless you’re heading due north you’ll see the red tip of the magnetic arrow point off to the right or left.
Holding the compass still turn the bezel until the red tip of the needle lines up with the “N” on the bezel. At this point the orienting arrow under the needle should also line up with it. The point where the index line crosses the bezel will give you your direction. If you want or need the most accurate bearing possible, turn the bezel to adjust for the appropriate amount of declination in your area.
Wait a minute! How do you know what the appropriate amount of declination is for your area? Good question. It’s important to figure this out before you go on your trip. Most topographic maps (9) have the declination for the area they represent indicated on the map.
However, if the map is an old one that declination may be off because magnetic north moves constantly as we said earlier. To get the latest declination reading for where you are going a better idea is to use the NOAA magnetic field calculator. It provides up to date declination readings absolutely free.
Once you confirm you are moving in your preferred direction, hike on a ways and then stop and take another reading. Your compass will be already set up from earlier. Simply take it out, align the red tip of the needle with the “N” on the bezel and follow the direction of travel arrow.
While you are checking your bearings try to find an object in the distance that the direction of travel arrow is pointing and make that the next place you’ll take a reading. So for instance, if the direction of travel arrow is pointing to a large boulder on a ridge a few hundred yards away walk toward that. When you get there, check your bearings again, choose another not-to-distant object that’s in the path of your direction of travel arrow and walk toward that, and so on.
Take your bearing from a map
If you have a map with you it can provide much needed context to the information you are getting from your compass. But only if you are certain of your present location. If that’s the case, if you can locate yourself with certainty on the map then you can set things up so that you can get your bearing from the map as you hike on.
To do that, place the map on a hard, flat surface, or as close as you can get to a hard, flat surface. Place the compass on the map and use the edge to draw a straight line between your current position and where you want to go. Place the compass over that the direction of travel arrow and the line you drew on the map align perfectly.
Then adjust the bezel of the compass to align “N” with the red tip of the magnetic needle. Adjust for declination and let the compass remain set up that way. As you walk, any time you need a bearing just take out the compass, align the needle with the “N” on the bezel and then continue walking in the direction that the direction of travel arrow is pointing.
FAQs
Is it really necessary to learn how to use a compass?
If you are a lover of the outdoors who is fond of going on hunting or hiking trips then the answer is “yes”.
While most of us have grown quite fond of our GPS devices, the fact is they are dependent on electricity. If you are deep in the backcountry and suddenly find yourself with a dead battery and no way to charge it, or your GPS device fails, as electronic devices are fond of doing, then you’re up the creek unless you have a compass. No batteries to fail with your compass.
Also, a GPS device can’t tell you which way you are going unless you’re moving. With a compass you can always tell which way you’re going. There are a couple of other reasons why you might want to eschew the GPS, besides the hassle of making sure you always have a charged battery.
First of all, electronic devices and the batteries that power them add weight, and every ounce matters when you’re on a long hike. Second, GPS devices are not always the most reliable source of information.
Are there different types of compasses?
There are several different types of compass, but there is no doubt the baseplate magnetic compass is the most popular, particularly with hikers and hunters. The other types of compass include:
- Gyrocompass – This type of compass uses a fast spinning gyroscope, friction, gravity, and the earth’s rotation to determine true geographic north. Since it is not magnetic the gyrocompass (10) negates the need for factoring in declination. However, this type of compass is large and quite expensive and totally impractical for taking on a hiking or hunting trip. They are most often used on ocean going vessels.
- Liquid compass – In many cases the liquid filled compass looks exactly like a standard baseplate compass. The only difference is that the compartment housing the magnetic needle is filled with liquid. The liquid reduces the amount the needle wobbles, which makes it easier to get an accurate reading.
- Marine compass – With this type of compass there is a compass card that’s mounted to a needle below it and the whole thing is suspended in fluid. As the needle moves the card moves and readings are taken relative to the fixed reference line on the glass casing. The fluid has a damping effect on the motion of the card making it easier to read.
- Thumb compass – This is a compact variation on the baseplate compass that, as the name implies, is attached to the thumb. The idea is that by affixing it to the thumb it leaves your hands freer to do other things. A lot of people find them confusing, which is one reason they have not exactly taken off.
- Astro compass – In both the north and south polar regions it can be difficult to get an accurate reading with a standard magnetic compass. The astro compass is a fairly bulky piece of equipment that uses time, longitude and latitude, as well as astronomical objects to determine true, not magnetic, north.
- Smartphone compass – It shouldn’t be a big surprise that there are compass apps for smartphones. The smartphone compass app uses the magnetometer built into most contemporary smartphones to find magnetic north. Just lay the phone on your map and align north on the phone compass with north on the map. That should help you determine the right direction to travel in. The downside is obvious: dead battery = no compass.
What could throw off a compass reading?
When trying to get an accurate reading from your compass you should avoid holding it or setting it near keys, your wristwatch, metal tables, your mobile phone or metal framed eyeglasses. In addition, some types of outdoor clothing use magnets to keep flaps closed over zippers and pockets. Those could definitely mess up your compass reading. Also, you are likely to get an inaccurate reading if you try to do so under or near power lines.
How long will a compass last?
A well-made baseplate compass will last for many years. However, if you drop it the baseplate or the housing may crack or break. And on very rare occasions the magnetization of the needle may reverse so that the north end points south. This reverse polarity (11) is believed to be most commonly caused by bringing the compass into close proximity with devices that contain magnets – particularly speaker magnets – such as those found in smartphones, walkie talkies and the like.